Insights and Research
The official blog of cloud security
Featured

Latest Posts


Report
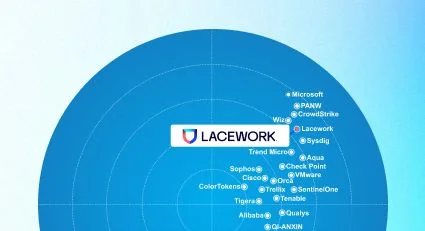
Frost Radar™: Cloud Workload Protection Platforms, 2023
Leading analyst firm Frost & Sullivan identifies key attributes of cloud workload protection platforms (CWPPs), then recognizes the vendors that excel in the market.
Read here